A sharp knife isn’t just safer—it’s an absolute joy to use. Whether you’re a professional chef, an outdoor enthusiast, or a home cook, knowing how to properly sharpen your knives is one of the most valuable skills you can develop. Yet many knife owners struggle with sharpening, either because they’ve never been taught correctly or they’re intimidated by the process.
The good news? Sharpening a knife isn’t rocket science. With the right tools, proper technique, and a bit of practice, anyone can maintain razor-sharp edges on their kitchen knives, tactical blades, or hunting tools. This comprehensive guide walks you through everything you need to know, from selecting the right sharpening system to mastering the techniques that professionals use.
Understanding Knife Sharpening Basics
Before we dive into techniques, it’s crucial to understand what sharpening actually does. When you use a knife, microscopic portions of the edge bend, chip, or wear away. Sharpening removes steel from the blade to create a new, sharp edge. This is different from honing, which simply realigns the existing edge without removing material.
The sharpness of your edge depends on three factors: the angle of the bevel, the consistency of that angle along the entire edge, and the fineness of the abrasive used. Professional sharpeners obsess over these details because they make the difference between a mediocre edge and one that effortlessly slices through tomatoes or shaves hair.
“A properly sharpened knife should glide through a ripe tomato using only the weight of the blade—no sawing motion required.”
Choosing Your Sharpening Method
Several sharpening methods exist, each with advantages and drawbacks. Understanding your options helps you choose the right approach for your needs and skill level.
Whetstones (Water Stones)
Whetstones represent the traditional sharpening method preferred by professionals and serious knife enthusiasts. These rectangular stones come in various grits—from coarse 400-grit for repairing damaged edges to ultra-fine 8000-grit for polishing. Japanese water stones require soaking before use and offer superior cutting speed compared to oil stones.
The main advantage of whetstones is control—you determine the exact angle and pressure. The learning curve can be steep, but once mastered, whetstones produce the sharpest possible edges. They’re ideal for Damascus steel and high-quality blades where you want maximum performance.
💡 Pro Tip: Starting Grit Selection
Beginners should start with a combination stone featuring 1000-grit on one side and 3000-grit on the other. This handles regular maintenance without the complexity of multiple stones. Add coarser (400-600) and finer (6000-8000) grits only after mastering the basics.
Guided Sharpening Systems
Systems like Lansky, Work Sharp, and Edge Pro use guides that maintain consistent angles for you. These eliminate the most challenging aspect of freehand sharpening—angle consistency. They’re perfect for beginners or anyone who wants reliable results without extensive practice.
The trade-off is speed and versatility. Guided systems work more slowly than skilled freehand sharpening, and some blade shapes don’t fit the guides well. However, for most home users maintaining standard tactical knives or kitchen blades, guided systems deliver excellent results.
Electric Sharpeners
Electric sharpeners offer convenience—just pull the knife through preset slots and you’re done. Modern three-stage systems (coarse, medium, fine) can produce decent edges on kitchen knives. However, they remove more steel than necessary, can overheat blades if used improperly, and generally produce adequate rather than exceptional edges.
Reserve electric sharpeners for everyday kitchen use where convenience trumps perfection. Never use them on expensive custom knives, traditional Japanese blades, or any knife where you care about preserving steel.
The Whetstone Sharpening Process: Step-by-Step
Let’s walk through the complete process of sharpening a knife on whetstones—the method that gives you the most control and best results.
Step 1: Prepare Your Stone
Soak your water stone for 10-15 minutes (follow manufacturer’s directions—some stones require longer). The stone should be wet but not dripping. Place it on a non-slip base or damp towel to prevent movement during sharpening.
Step 2: Determine Your Angle
Most kitchen knives sharpen best at 15-20 degrees per side. Tactical and outdoor knives benefit from slightly larger angles (20-25 degrees) for durability. Japanese knives often use steeper angles (12-15 degrees) for maximum sharpness.
To find a 20-degree angle without a guide, imagine dividing a 90-degree corner into four equal parts—that’s approximately 22 degrees. Most people struggle with angle consistency initially. Consider using an angle guide until muscle memory develops, or stack coins under the spine to create a reference height.
⚠️ Common Mistake Alert
The biggest sharpening error is inconsistent angles. Changing your angle by even 5 degrees creates a new bevel rather than sharpening the existing one. This wastes steel and time. Focus on consistency over exactness—a consistent 22-degree edge outperforms an inconsistent 20-degree attempt.
Step 3: Start with Coarse Grit
Begin with your coarsest stone (typically 1000-grit for maintenance, 400-grit for repair). Hold the knife at your chosen angle and sweep the entire edge across the stone, moving from heel to tip. Apply moderate, consistent pressure.
Use either the pushing method (edge leading) or pulling method (edge trailing)—both work well. Many professionals prefer the pulling motion as it’s less likely to cause injuries if you slip. Maintain your angle throughout the entire stroke. Complete 10-15 strokes on one side before flipping to the other.
Step 4: Check for a Burr
After working one side, carefully run your finger perpendicular to the edge (moving away from the sharp side). You should feel a slight burr—a thin metal lip that forms on the opposite side. This burr indicates you’ve sharpened all the way to the edge. If no burr forms, continue sharpening that side.
Once you feel the burr along the entire edge, flip the knife and repeat on the opposite side until a burr forms there as well. This ensures you’ve removed enough steel to create a new edge.
Step 5: Progress to Finer Grits
Move to your medium stone (3000-grit) and repeat the process with lighter pressure. You’re refining the edge created by the coarse stone. The burr should become smaller and more delicate. Continue with even finer stones if desired—each step polishes the edge more smoothly.
Step 6: Remove the Burr
The final burr must be removed or it’ll break off during use, leaving a prematurely dulled edge. Make several very light alternating strokes on your finest stone—one stroke on each side, progressively reducing pressure. The burr should break away cleanly. Some sharpeners finish by gently stropping on leather or newspaper to remove any remaining burr.
Testing Your Edge
Several tests verify sharpness. The paper test is most common—a properly sharpened knife should slice cleanly through paper with minimal resistance. The tomato test checks kitchen knives—the blade should penetrate the skin using only its weight. For ultimate sharpness, try the arm hair test (carefully!)—a razor-sharp edge will shave arm hair effortlessly.
Maintenance Between Sharpenings
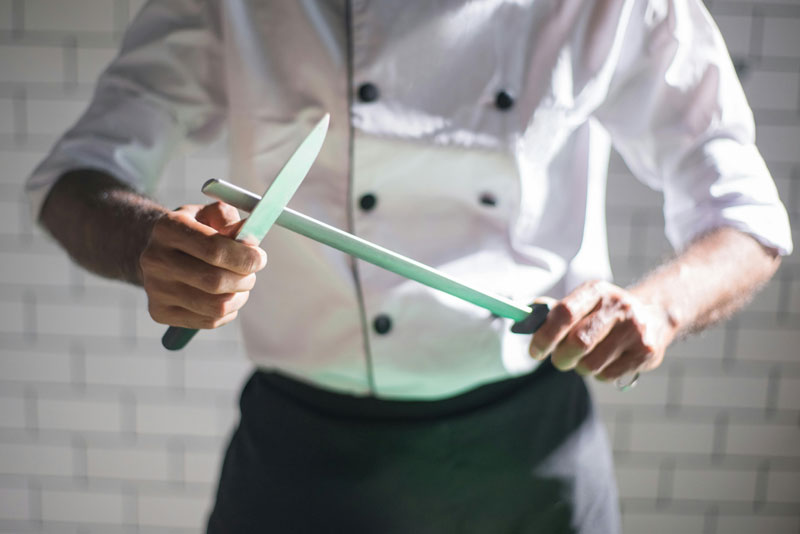
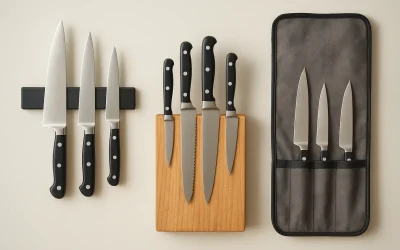
Proper care extends the time between sharpenings. Use honing rods regularly—a few swipes before each use realigns edges that have bent rather than dulled. Always use appropriate cutting boards (wood or soft plastic, never glass or stone). Hand wash and dry your knives immediately rather than leaving them in the sink or dishwasher. Store knives properly to prevent edge contact with other utensils.
Common Sharpening Problems and Solutions
Problem: Edge feels rough or “toothy” rather than smooth.
Solution: You need to progress to finer grits. The coarse stone creates tiny serrations—finer stones polish them away. Always finish on at least 3000-grit for smooth edges.
Problem: Blade gets duller quickly after sharpening.
Solution: You’re likely not removing the burr properly, or your angle is too acute for your knife’s use. Try a slightly larger angle for durability, and ensure complete burr removal.
Advanced Techniques
Once you’ve mastered basic sharpening, consider these advanced methods. The coin-stacking technique uses quarters stacked under the blade spine to maintain consistent angles. Circular sharpening motions work well for convex edges. For severely damaged blades, consider thinning behind the edge to restore geometry before regular sharpening.
Professional sharpeners often finish with stropping—pulling the blade edge-trailing across leather loaded with polishing compound. This final step produces mirror-polished edges that are frighteningly sharp. While not necessary for working knives, stropped edges represent the pinnacle of sharpening achievement.
When to Seek Professional Help
Some situations call for professional sharpening services. Severely damaged blades with chips or broken tips often need grinding wheels and expertise beyond home sharpening. Extremely expensive custom knives deserve professional attention if you’re not confident in your skills. Japanese single-bevel knives require specialized knowledge. And if you simply don’t enjoy sharpening, professional services typically charge $5-10 per knife—reasonable for the time and effort saved.
Conclusion: The Journey to Mastery
Learning to sharpen knives properly takes time and practice. Your first attempts won’t produce professional results—that’s completely normal. Start with an inexpensive knife to practice technique before working on valuable blades. Watch your angles, develop muscle memory, and pay attention to the burr formation.
The investment in learning pays enormous dividends. Once you can maintain your own edges, you’ll never again struggle with dull knives. Your kitchen work becomes easier, your outdoor adventures safer, and your knife collection stays in peak condition. Plus, there’s genuine satisfaction in the skill itself—the quiet focus of sharpening, the meditation-like repetition, and the pride of creating edges that perform beautifully.
Ready to start your sharpening journey? Check out our curated selection of sharpening systems and accessories to find the tools that match your needs and budget. And remember—every expert sharpener was once a beginner. With patience and practice, you’ll soon be producing edges that rival professional results.
Ready to Upgrade Your Knife Collection?
Explore our curated deals on premium knives and essential maintenance tools.

